The Lytmi Neo Sync Makes My Programs Look So Colorful!

Jeffrey Clos is a participant in the Amazon Associates LLC associates program, an affiliate advertising program designed to provide a means for sites to earn advertising fees by advertising and linking to Amazon.com. There are some links within this article to the described product.
As mentioned in an earlier post, I was anxious to broaden my viewing experience with the televisions we have in our home.
As described in the above article, there are options, but I had settled upon Lytmi’s (pronounced “Light Me”) offering. The Neo HDMI Sync Box 2.0 had the features I was looking for, and it was less expensive than the Philips Hue Play HDMI Sync Box.
The hardest part of the whole experience was the wait. I ordered two kits on 12/30 and waited for them to arrive in under two weeks. I hoped it was worth the wait from China to my front door!

Tracking History (media by JC)
It was now time for the unboxing.

Lytmi (NEO Sync Box) media by JC
The excitement was brewing, and everything I had read told me this was the package for me. I bought two of these kits, one for my upstairs television and my downstairs tv. The package included two LED light strips, a NEO control box, and several command strip brackets to affix the lights to the TV.

Unboxing (media by JC)
The curved brackets were used for the corners, and the straight-edged for the sides, top, and bottom. Simple enough……

Side view (media by JC)
Simple enough, with four corners and four curved brackets. Two straight-edged brackets for the top, two for the bottom, and one each for the sides (Pictured)

LED Strips (media by JC)
I love the light strips, and the fact is they don’t feel cheap. I followed the instructions and ensured the connector cords started (looking at the front of the TV) at the leftmost bottom portion of the TV. The first strip started from the bottom, working to the top and then traveling to the right-most part of the TV. The second strip started from the bottom and worked to the right portion of the TV and then up to the top right corner. The 65″ and below kit was the perfect length for the LED cable.

Unfortunately, I had bought the larger kit for my upstairs TV and cut the excess cable. Not a big deal, but it seemed like a big waste. Maybe I can repurpose these for something else (Sure!)
Note: There are illustrated cut points on each strip. They made these “idiot-proof.”

Neo Box (media by JC)
The box is small and inconspicuous. Unlike the Philips offering, this will only allow you to hook up one device simultaneously without using an HDMI switch. The Philips offering has four HDMI inputs (I believe). I use an upscaling receiver upstairs and downstairs, which does my HDMI input switching for me.
I plugged in the two USB cables from both LED strips near my TV's leftmost portion. I ran the setup within the downloaded LYTMI application on my phone, and I was ready to go. (I had to reverse the USB cables as my colors were different according to the setup procedure)

Television Off (media by JC)
I wanted to run the lights without the television activated. You can test many scenes (Fireworks, rainbow, star, drip, etc.)

Various Scenes (Media by JC)
I believe this scene is called “ball.” The Lytmi kit is also sound-sensitive and will dance in unison with music playing in the background. I had a little bit of fun with this.
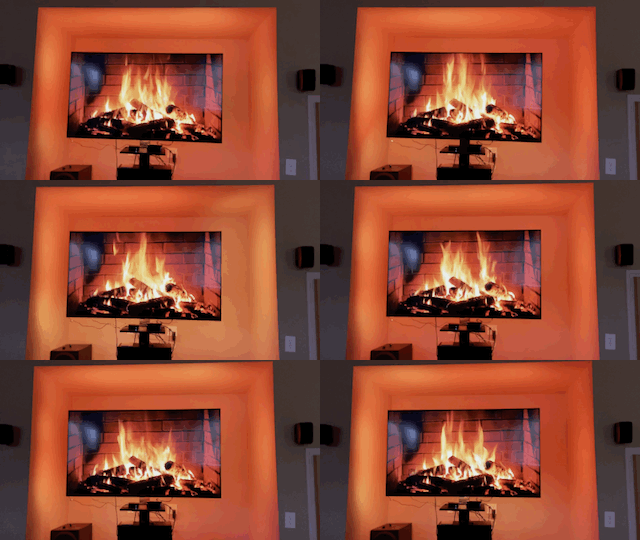
It was time to run a few shows to check out the full capabilities. I ran a 4K video of a fire on YouTube. This was the result:

Fireplace (media by JC)
Conclusion: After a few days of using and tweaking the system, I am overall pretty impressed. I am pleased not to have an external camera (Like the GOVEE system) to get my preferred lighting effect. There is no lag (delay) in the backdrop lighting. I have watched hockey games (The ice emits a bright light bluish-white glow), sampled the movie Avatar, managed a few new programs on the Magnolia network, and performed admirably.
I like the system and can’t wait to put it through its paces. I view it as something to put a little color into a dreary “Pandemic Ridden” timeframe.

Upstairs TV (media by JC)